At times I get asked whether sponge cake can be use for fondant cake construction. Well, this question is a bit tricky because it depends on which sponge cake recipe is used and how the cake is prepared before fondant is draped on. Fondant itself is pretty heavy. With all the weight of the fondant and the decorations, the cake is gonna settle if the cake layers are not firm enough so fluffy cake is a big no-no. Today I’m sharing with you a sponge cake recipe that is soft yet sturdy enough to be stacked and withstand the weight of fondant. I will also show you a trick to prevent air bubbles and bulges in your cakes,
每隔一段時間總有網友私訊EC詢問關於可否用海綿蛋糕製作翻糖蛋糕的問題。 此問題其實有點兒複雜,因為答案取決於所選用的海綿蛋糕食譜和蓋上翻糖前的蛋糕處理手法。 翻糖本身是很重的,再加上放在蛋糕表面的裝飾的重量,蛋糕體若不夠紮實的話,基本上一蓋上翻糖後蛋糕便會被壓扁,因此絕不能使用鬆軟的蛋糕體。而今天EC將分享一款較紮實和能承重的海綿蛋糕食譜,同時也會分享防止翻糖蛋糕出現氣泡和腰身的小妙法。
If you want your fondant cake to look smooth and sleek, the cake layers must be stacked and iced perfectly. Air trapped within the cake has to be expelled ahead of time before fondant is applied. I spent a pretty good deal of time preparing my cake before covering it with fondant. I like to frost my cake with dark chocolate ganache instead of buttercream because of its quick preparation, not-so-sweet and better taste (especially if couverture chocolate is used) as well as the firmer and silkier texture. After filling my cake I would compress it with something heavy on top to let the cake settle for at least half an hour. Such compression serves a dual purpose. The first purpose is to mimic the weight of the fondant so the cake would not be further pressed when fondant is being draped on. Second is to expel air that is trapped in between the layers. What I do is to cover the top of the cake with a piece of parchment paper first. Then I would place on a slightly bigger cake pan and then put something heavy inside. For a 6” filled cake, for instance, I would place an 8” cake pan with a 2-lb dumbbell or two cans of Carnation evaporated milk on top. If the cake can withstand the weight of the dumbbell without distortion then it could handle the weight of fondant together with other decorations. Without prior compression, gravity would take over and make the cake settle over time and air that is trapped inside the layers of cake will escape from the sides when the fondant is being draped over. The trapped air would have nowhere to escape because the cake is all sealed with fondant and what you see would be air bubbles under the fondant. If your filling is not firm enough it may even ooze out in between the layers, creating ugly bulges that resemble Michelin man. Air bubbles can be easily fixed by popping the area with a fine needle at an angel and then gently deflating and smoothing the fondant while it is still soft. How about the Michelin-man-bulge, a slanting or even sagging cake? Frankly, there is no way to fix it but to redo the fondant. Perhaps you may add something on top to hide or camouflage the flaws. If time allows and there is extra fondant, remove the fondant layer carefully without damaging the cake then smooth and repair the sides as needed. Repeat the compression process that is mentioned above and re-apply the fondant. I am not going to lie to you and yes, that happened to me once. When I saw my cake bulging awfully at midnight, I almost bursted into tears because all my hard work was wasted plus I was too sleepy to fix my cake. I ended up rescuing my cake by removing and reapplying the fondant. So always have extra fondant on hand in case of an emergency! That was truly a frustrating experience. But I’ve become more equipped while learning from mistake and through failures.
若要翻糖蛋糕外型平滑,蛋糕體本身必定要疊得漂亮,外面也要十分平滑,因此抹面工夫絕對不能偷懶,蓋上翻糖前更要預留充足時間排出蛋糕間的空氣。EC每次均花不少時間為蛋糕打底,一般使用黑朱古力醬而非奶油霜作夾餡。黑朱古力醬不但製作簡單,味道不甜很好吃(尤其是使用調溫朱古力時),質地也比較挺身,抹面時十分均勻平滑。抹面工作完成後EC會把重物壓在蛋糕頂部至少半小時讓蛋糕沉澱一下並排出空氣。對蛋糕施壓主要有兩個原因,第一就是模擬翻糖的重量以致蛋糕在真正蓋上翻糖時不會進一步被壓扁。第二就是把夾層間的空氣排走。EC一般會在蛋糕表面放上牛油紙再把比蛋糕體大一點的蛋糕模放在上面之後再放上重物。以六寸蛋糕體為例,EC會放上八寸蛋糕模和一個兩磅啞鈴或兩罐三花淡奶。倘若蛋糕體沒有被啞鈴壓至變形,那麼它便能承受翻糖和其他裝飾的重量了!沒有預先施壓便直接把翻糖蓋上的話, 那麼地心吸力會令蛋糕隨著時間慢慢往下沉並排出空氣。由於蛋糕已被翻糖密封了,空氣沒處可逃便會在翻糖和蛋糕間形成氣泡,若霜飾過軟時甚至會從夾層間擠出而出現像米芝蓮人般的環形腰身。 若發現氣泡可趁翻糖仍柔軟時用幼細的針斜斜地插入氣泡處將其戳破,然後溫柔地用手擠出空氣並撫平表面。 若蛋糕出現米芝蓮人腰身或被壓至變形而傾斜甚至下陷呢?對不起,除非重蓋翻糖,否則蛋糕已不能回復原狀了,唯有利用其他裝飾遮掩瑕疵吧!有充足時間和剩餘翻糖的話便可小心奕奕的把所有翻糖取走,只是要盡量小心不要撕破蛋糕,有需要的話便要重新扶正蛋糕和抹面,之後用上述方法為蛋糕施壓,最後以新的翻糖覆蓋蛋糕(因此購買翻糖時最好預備多一點以備不時之需)。EC不打算說謊,是的,EC確實曾遇過這情況:深夜時才驚覺蛋糕出現肥肥的腰身!眼見自己的心血化為烏有,再加上EC實在已很疲倦,那刻差點兒要崩潰了!最後EC要重新蓋上翻糖才能修復蛋糕。這些都是慘痛的經歷,但失敗能磨練人使人成長,只要在錯誤中吸取經驗並不斷練習,蛋糕就能越做越好。
Now back to the sponge cake. In terms of method, I am using the same technique applied in Chocolate Genoise as I found it pretty convenient so I highly recommend this. For the “separated egg method”, feel free to visit my other blog post, Basic Sponge Cake.
還是說回海綿蛋糕吧!EC這次使用了朱古力海綿蛋糕內的方法製作蛋糕,因為這方法是超級方便的,EC非常推薦用這個!至於分蛋法海綿蛋糕請參考原味海綿蛋糕。
Basic Sponge Cake (2)
原味海綿蛋糕 (二)
Makes 6” round cake
六寸圓形蛋糕份量
Ingredients
100 g cake and pastry flour
A pinch of salt
40 g milk
40 g unsalted cultured butter
3 egg whites, large
1/2 tsp white vinegar or lemon juice (I used Korean apple vinegar)
60 g granulated sugar (I used organic cane sugar)
3 egg yolks, large
Notes: The eggs I use are about 50 to 55 g each without shells.
材料
低筋麵粉 100克
鹽 少許
牛奶 40克
無鹽發酵牛油 40克
大蛋蛋白 3個
白醋或檸檬汁(EC用韓國蘋果醋) 1/2茶匙
細砂糖(EC用有機蔗糖) 60克
大蛋蛋黃 3個
註:EC用的大蛋每隻淨重約50至55克
Directions 做法
Preheat oven to 325ºF/165ºC. Line bottom of pan with parchment paper round. Double sift together the flour and salt. Set aside.
焗爐預熱325ºF/165ºC,蛋糕模底部放上牛油紙,麵粉及鹽混合過篩兩次備用。
Combine milk and butter in a small saucepan. Set pan over low heat until butter is melted (or use the microwave). Keep mixture slightly warm.
牛奶及牛油放小鍋小火加熱(或用微波爐加熱)至牛油溶化拌勻後保持微暖備用。
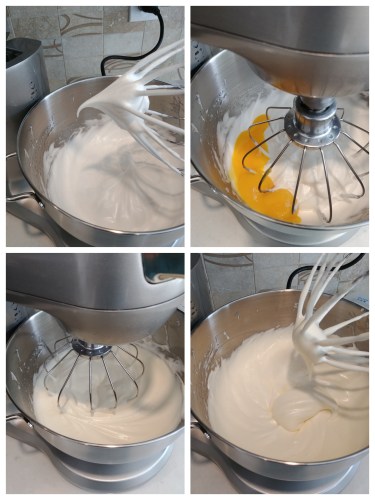
Combine egg whites and vinegar (to stabilize the meringue) in an impeccably clean mixing bowl. With a stand mixer fitted with the whisk attachment, whip mixture with medium-high speed until soft peaks form. Add sugar in two batches and continue beating until glossy and firm peaks form. Add in the yolks and beat with medium-low speed for about one minute or until incorporated. The mixture will be very creamy, fluffy and hold soft peaks while you lift the whisk up.
取清潔的鋼盆放入蛋白和醋,用坐枱式攪拌器(使用打蛋器配件)將蛋白中高速打至軟勾狀,分兩次加入糖打至企身和有光澤,加入蛋黃轉用中低速打大約一分鐘至稠身,蛋漿此時變得順滑蓬鬆及呈軟勾狀。
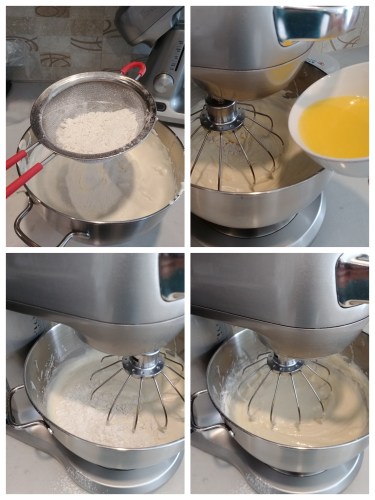
Sift in half of the flour mixture and mix with the lowest speed until almost incorporated. Add in the milk-butter mixture and stir to combine. Add remaining flour and mix until just incorporated. Clean the sides and bottom of the mixing bowl with a spatula. Mixture should be smooth, thick and lump free.
篩入一半粉類用最低速拌勻至差不多沒有粉粒, 加入牛奶牛油混合物繼續低速拌勻,篩入餘下麵粉拌至剛無粉粒,之後用膠刮清理盆底和盆邊成為順滑無顆粒並蓬鬆的麵糊。
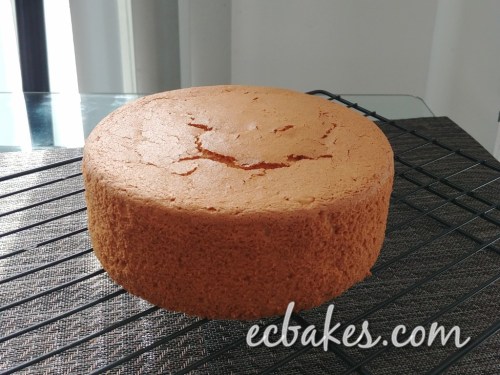
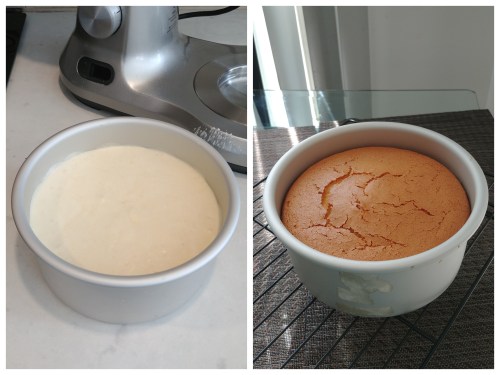
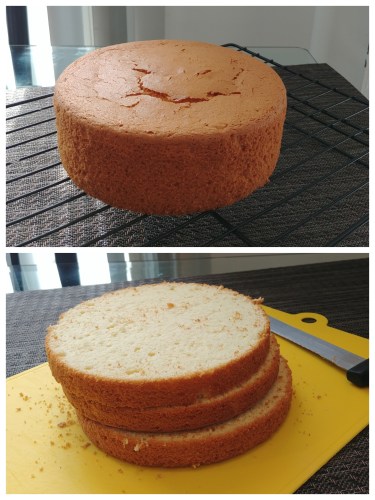
Pour batter into pan and smooth top with a spatula. Tap cake pan against the kitchen counter several times to get rid of any large air bubbles. Bake for 30 minutes at 300ºF/150ºC then raise temperature to 325ºF/165ºC and bake for another 15 to 20 minutes or until the cake springs back to the touch and a toothpick inserted into the center of cake comes out clean. Every oven is different so adjust baking time accordingly and cover the pan with a piece of aluminum foil if the top browns too much. Drop cake pan on the kitchen counter at a distance upon removal from the oven to release any gas trapped in the cake cells and minimize shrinkage. Cool on a wire rack before unmolding. Level cake and slice into multiple layers accordingly.
將麵糊倒入模中,將模往枱上輕敲幾下敲出較大的氣泡,用曲柄抹刀抹平表面後入爐先用300ºF/150ºC焗30分鐘,之後轉325ºF/165ºC多焗15至20分鐘或至蛋糕表面有彈性及竹籤插入蛋糕中央取出不沾麵糊(請自行根據自家焗爐火力調整溫度和時間,若蛋糕已上色便要加蓋錫紙),取出轉移到鋼架放涼後可脫模,用刀切去頂部突出部份並按需要切片使用。
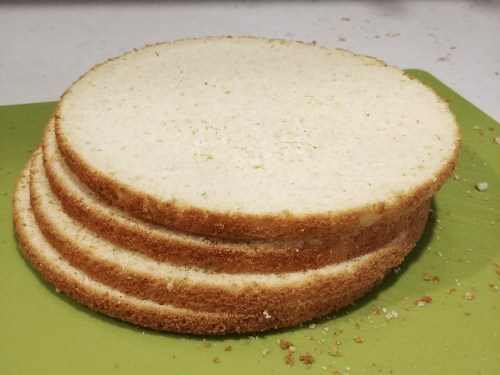
I sliced my cake into 3 layers.
EC把蛋糕横切成三片。
Doubling the recipe would yield an 8” round cake and I sliced the cake into four half-inch layers. Baking time is approximately 40 minutes at 300ºF/150ºC followed by an extra 15 to 20 minutes at 325ºF/165ºC.
食譜雙倍份量可製作一個八寸圓形蛋糕 ,放涼後EC將其横切成四片半寸厚蛋糕片。焗法大約是先以300ºF/150ºC焗40分鐘,之後轉325ºF/165ºC多焗15至20分鐘。
EC利用海綿蛋糕做了城堡翻糖蛋糕。 底下的蛋糕插了珍珠奶茶飲管作支柱支撐上面的蛋糕。
This fondant castle cake was constructed with sponge cake base. Bubble tea straws were inserted into the bottom cake as dowels to support the top tiers.

If you want to republish this recipe, please link back to this post.
版權所有,如需引用,請註明出處
EC Bakes 小意思 Facebook 專頁 www.facebook.com/ECBakes
© Copyright 2019 ecbakes.com

Leave a comment