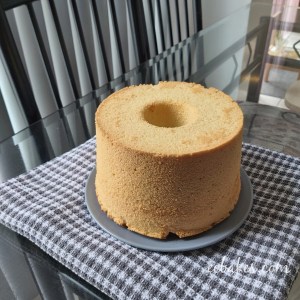
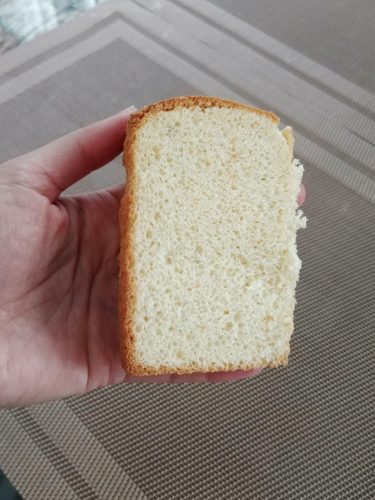
Chiffon cakes are my favorite kind of cakes. I even use them as the cake base for my mousse and whipped cream cakes. I like chiffon cakes more than sponge cakes as they are fluffier and more moist. You don’t need to brush any simple syrup on top of the chiffon cake when assembling the cake. Adding syrup = adding sweetness. So definitely that is something I am always trying to avoid.
戚風蛋糕是EC最愛的蛋糕,EC甚至做鮮忌廉及慕絲蛋糕時亦以此為蛋糕底。EC愛戚風過於海綿蛋糕因為它較有彈性及濕潤,戚風蛋糕在組合時不用像海綿蛋糕般掃糖水防乾,掃糖水會令蛋糕甜度增加,因此EC會盡量避免。
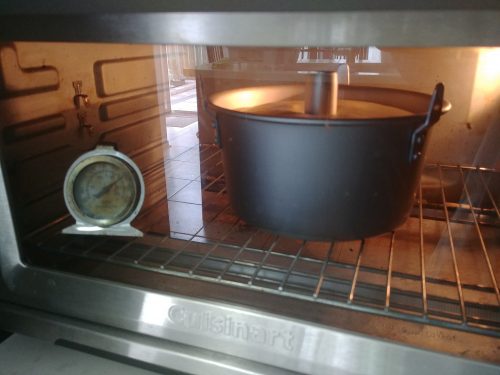
Updated Oct 15, 2018. I have taken some new pictures last week and made slight adjustment to the recipe. My countertop oven is pretty small and the chimney of my 7” tube pan is almost touching the upper heating element (my 10” tube pan won’t even fit in!!!). I couldn’t use oven temperature that is too high so I could hardly bake chiffon cakes with a golden brown crust. My new strategy is to start off with a lower temperature, like 300℉/150℃ instead of 325℉/160℃ that I would typically use throughout the entire baking process, and bake for approximately 40 minutes until the cake has reached its maximum height. If you prefer neater cracks on the surface of your cake you may even take out the cake and cut some slits after the first 10 minutes of baking. I will attach some pictures at the end. Then I would cover the cake loosely with aluminium foil then raise the oven temperature to 340℉/170℃ with fan on and continue baking until the cake has reduced slightly in height and is golden on top, which could take any time between 10 and 15 minutes. This method takes longer but after trying a couple of times, my cakes all have deep golden brown crusts. With a lower initial temperature my cakes also rose steadily and evenly and would not touch the top heating element. Just note that the indicated times as well as oven temperatures both serve as a reference only. Most of us has ovens of various brands, functions and capacities (for example my Cuisinart oven has a capacity of 0.95 cubic feet or 26.9 liters and the temperature of the upper and lower heating elements cannot be adjusted independently). You will need to find out your optimal baking temperature and time through trial and error. If you have tried my method and are satisfied with the result, do send me some cake pictures and let me know!
2018年10月15日更新:上星期為製作過程重新拍了照片並微調了食譜。EC家中小型焗爐容量細,七寸戚風蛋糕模的煙囪與上發熱線十分接近(甚至連十寸戚風模也容不下),因此爐溫不能過高,以致蛋糕外皮難上色。最近改變了策略,初時使用300℉/150℃低一點的爐溫(平時全程使用325℉/160℃), 焗大約40分鐘左右直至蛋糕升至最高點(喜歡蛋糕裂紋整齊的甚至可以先焗十分鐘後取出蛋糕用小刀劃線劃破表面,網誌末端有比較圖片),之後用錫紙輕輕蓋在蛋糕上,再調高溫度至340℉/170℃,使用熱風對流多焗10至15分鐘左右直至蛋糕高度略為下降並表面金黃。此方法需時多一些,但是EC試驗了幾次,每次效果都很滿意哦!蛋糕外皮都是金黃色的,在較低溫的環境下蛋糕平穩地緩緩上升,絕不會因過份膨脹而碰到上發熱線。請注意因為各家焗爐型號,功能及內容量都有別(例如EC的Cuisinart焗爐內容量為0.95立方英尺或26.9公升,上下火不能獨立調校溫度),因此EC提供的時間及爐溫僅供參考。大家需要多試幾次才能掌握到自家焗爐的最佳爐溫及時間。倘若大家試過此方法亦覺得效果理想,歡迎留言並傳送相片告訴EC哦!
Vanilla Chiffon Cake
雲尼拿戚風蛋糕
For 7” tube pan
7”戚風模份量
Ingredients
80 g cake and pastry flour
A pinch of salt
4 egg yolks, large
45 g milk
40 g grapeseed oil
1 tsp vanilla bean paste or pure vanilla extract
4 egg whites, large
1/2 tsp white vinegar or lemon juice
60 g granulated sugar (I used organic sugar)
Notes: The eggs I use are about 55 g each without shells.
材料
低筋麵粉 80克
鹽 少許
大蛋蛋黃 4個
牛奶 45克
葡萄籽油 40克
雲尼拿醬或純雲尼拿油 1茶匙
大蛋蛋白 4個
白醋或檸檬汁 1/2茶匙
細砂糖(EC用有機蔗糖) 60克
註:EC用的大蛋每隻淨重約55克
Directions 做法
Preheat oven to 325ºF/160ºC.
焗爐預熱325ºF/160ºC。
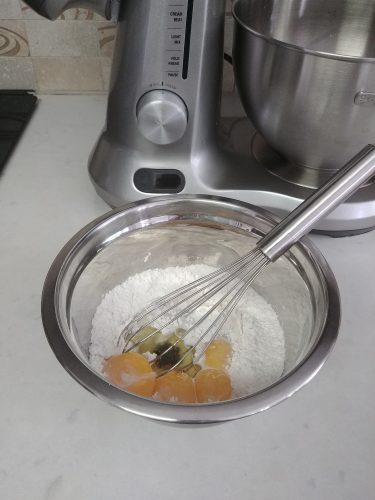
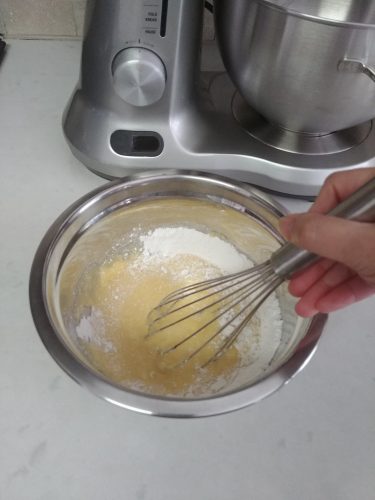
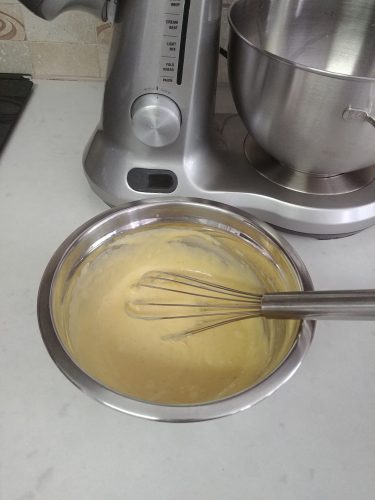
Sift flour and salt into a mixing bowl. Make a well in the centre then pour in the egg yolks, milk, oil and vanilla. Whisk gently until incorporated. Set aside.
低筋麵粉和鹽混合過篩放入鋼盆中,中開一穴後倒入蛋黃,牛奶,油和雲尼拿醬,輕手用蛋拂攪拌均勻成蛋黃糊備用。
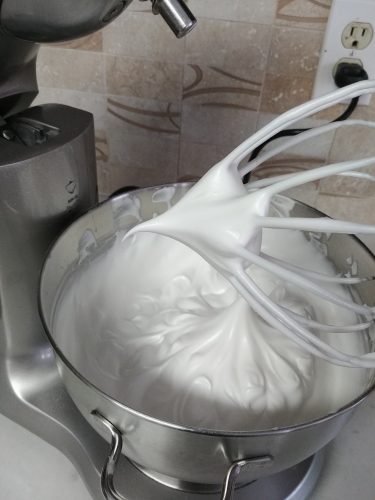
Place egg whites in another clean mixing bowl (I usually wipe the bowl and the wire beater with paper towel dampened with vinegar or lemon juice to remove traces of grease). With a hand mixer or a stand mixer fitted with the whisk attachment, whip egg whites until foamy. Add vinegar (to stabilize the meringue) and continue beating until soft peaks form. Gradually add sugar in batches and continue beating until glossy and firm peaks form. When you lift up the whisk, the peak will hold its shape but the tip will fall back slightly.
把蛋白放在另一清潔的鋼盆中(EC習慣把鋼盆及打蛋器配件預先用廚房紙沾檸檬汁或白醋抹一次去除殘餘油份),用電動打蛋器或座枱式攪拌器(使用打蛋器配件)將蛋白打至起粗泡,加入白醋(可令蛋白霜更穩定)繼續打至蛋白組織變細密,分次加糖打至有光澤及企身,蛋白霜拉起時呈尖長而末端輕微下垂狀。
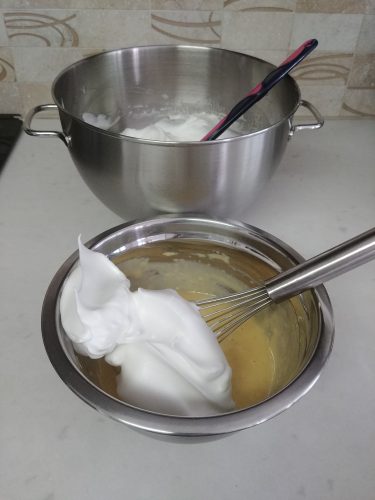
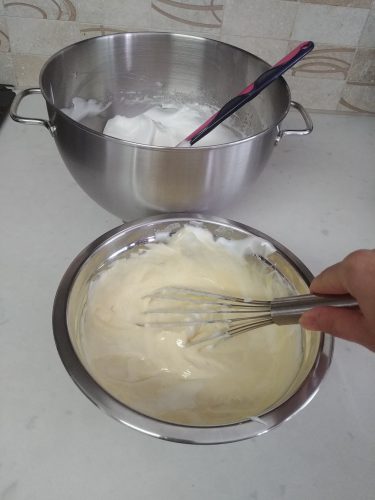
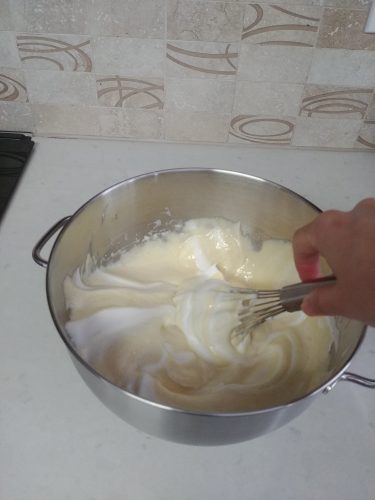
Scoop about one third of the meringue into the yolk batter and fold with a whisk to lighten. Then scrape this back into the bowl of meringue. Fold gently and thoroughly (so you don’t deflate the meringue) with a spatula until homogeneous.
將三分一蛋白霜混入蛋黃糊中用蛋拂以切拌方法充份拌勻,再倒回蛋白霜鋼盆中輕手用膠刮以切拌方法混合至麵糊成均一顔色,盡量輕手並快手完成混合以免蛋白霜消泡。

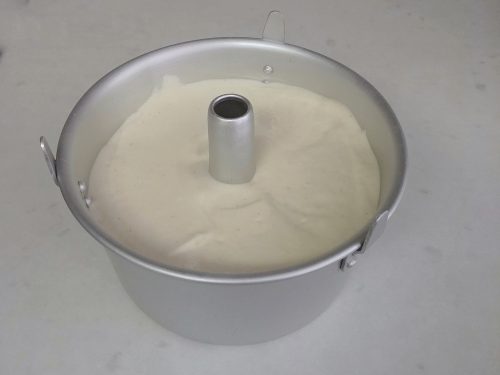
Pour batter into an unprepared tube pan. Tap pan against the kitchen countertop several times to get rid of any large air bubbles. Smooth top with an offset spatula.
將麵糊倒入戚風模中(模內不用抹油掃粉),將烤模往枱上輕敲幾下敲出較大的氣泡後抹平表面。
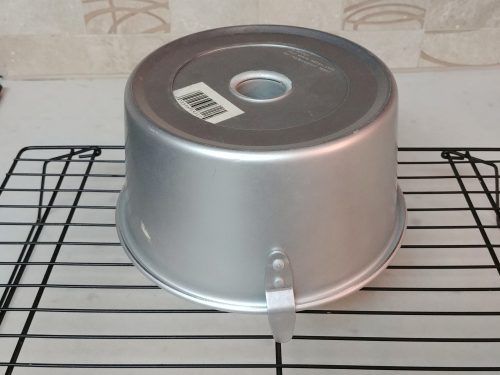
Bake for 30 to 35 minutes or until a wooden skewer inserted in the center of cake comes out clean. If you are like me who use a small-capacity oven or would like a more golden crust, please follow the instructions at the beginning of the blog post. Every oven is different so adjust baking time accordingly. Drop cake pan on the kitchen countertop at a distance upon removal from the oven. This will release any gas trapped in the cake cells and minimize shrinkage. Invert pan on a wire rack to cool completely before unmolding.
入爐焗30至35分鐘或至竹籤插入蛋糕中心取出後不沾麵糊,若像EC般擁有細容量焗爐或想蛋糕外皮金黃一些可依照網誌開頭的指示利用兩段爐溫,不同焗爐可能要不同時間,請自行調節,取出後將蛋糕連烤模從半空往枱上捽一下將困於蛋糕內的空氣震破避免蛋糕回縮,在鋼架上倒扣放涼後可脫模。

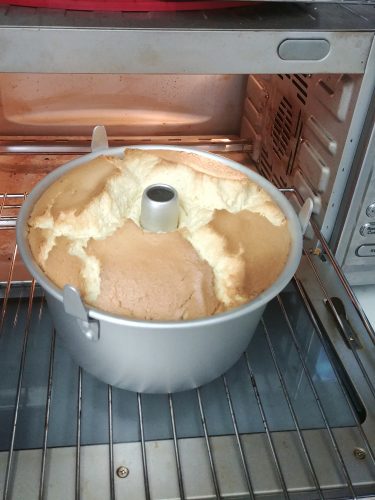
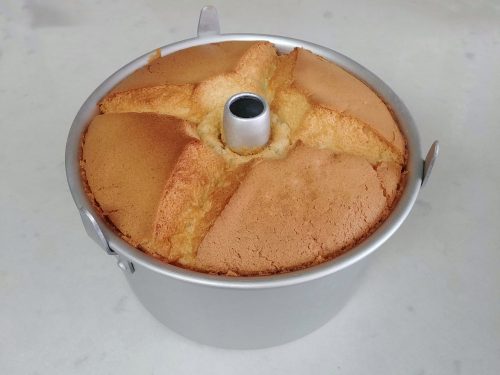
By cutting some slits on top once the skin has formed, you can control where the cake will crack open. I’ve made four slits here.
在結皮後以小刀劃線可控制蛋糕裂紋位置(這裡劃了四條線),蛋糕會乖乖地從破口裂開。
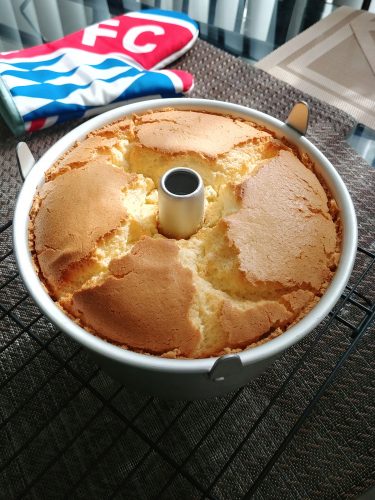
Without any disturbance, the cake cracks randomly on top.
不給蛋糕劃線的話,蛋糕便隨心爆裂。
If you want to republish this recipe, please link back to this post.
版權所有,如需引用,請註明出處
EC Bakes 小意思 Facebook 專頁 www.facebook.com/ECBakes
© Copyright 2015 ecbakes.com

great read ^_^
LikeLike