I made two Little Pony themed cakes in June. And I am sharing with you today how I made my rainbow cake toppers. I love using modeling chocolate as my medium as it is less stretchy and dries so much faster (pop decorations in the freezer for a few minutes and they will dry almost instantly). The topper can also be made with gumpaste or homemade fondant with tylose powder added. However, the drying time would probably be longer.
EC在六月時做了兩個以My Little Pony為主題的蛋糕,今天跟大家分享彩虹蛋糕插牌製作過程。EC較喜歡用造型朱古力作蛋糕裝飾,因為它們既不易變形,更可在短時間內乾透(趕時間時只需把裝飾放進冰箱幾分鐘已可使用)。插牌當然亦可用gumpaste或加了tylose powder的自製翻糖製作,只是風乾時間或許要加長。
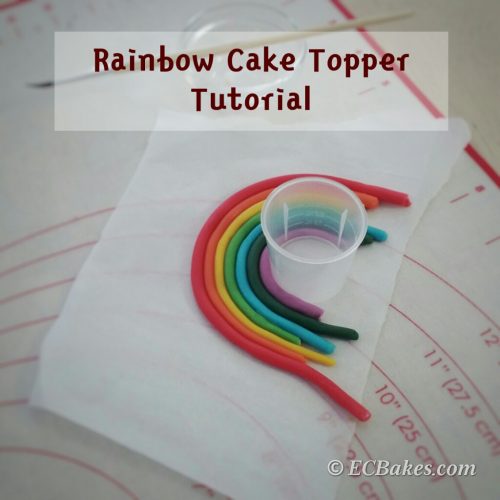
How To Make A Rainbow Cake Topper
彩虹蛋糕插牌做法
What you need
Modeling chocolate of red, yellow, blue and white
Edible glue (I used equal parts of light corn syrup and water)
Parchment paper
Small bowl and paint brush
Sharp knife
Toothpicks
材料及工具
造型朱古力 (紅、黃、藍和白色)
食用膠水 (EC用一比一份量的粟膠及水)
牛油紙
小碗及畫筆
小刀
牙籤
Directions 做法
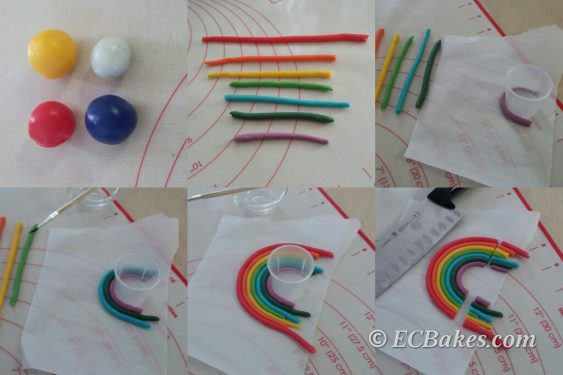
First make your rainbow colors. With modeling chocolate of red, yellow and blue, create orange (red and yellow), green (yellow and blue), indigo (blue with a little bit of red), and purple (red and blue). Mix with white modeling chocolate if the shade is too dark.
首先準備彩虹顏色:用紅、黃、藍色造型朱古力溝成橙(紅加黃)、綠(黃加藍)、紫藍(少紅多藍)及紫色(紅加藍)備用,如顔色太深可加少量白色搓匀。
Roll each color into long ropes. You will need more for red, orange and yellow.
將每種顔色的造型朱古力搓成長條,紅橙黃色要最長一點。
Work on a piece of parchment paper so it’s easier to move the rainbow around. Pick something with a circular base as a guide or support. It could be a circle cookie cutter, a bottle cap or a cylindrical building block, depending on how big you want your rainbow to be. Wrap the purple rope around the top half of your guide. Place the indigo rope above the purple one and glue the two ropes together with edible glue. Continue with the rest of the colors.
預備一張牛油紙作底紙方便移取彩虹,取一底部為圓形的物件作支撐,例如小曲奇模、小藥水杯、圓形玩具積木等等,可依彩虹大小而選擇,由紫色開始,將長條圍在支柱上半部,將紫藍色排在上面,長條之間用畫筆掃上食用膠水黏合,繼續排放並黏上餘下顏色。
Remove the guide and chop off the bottom neatly with a sharp knife. Insert one to two toothpicks on each side of the base of the rainbow (I forgot to take pictures for that). For the clouds, roll white modeling chocolate into balls of different sizes. Attach balls to the base of the rainbow with edible glue. You may also cut out pieces of cloud-shaped modeling chocolate with a sharp paring knife and attach them to the rainbow base. Let dry completely in a cool place before placing onto cakes.
完成彩虹後除去支柱,用刀整齊地切去底部,將一至兩支牙籤插在彩虹底部做成插牌(EC忘記拍照了),用白色造型朱古力搓成不同大小的小圓球做成雲,將圓球用食用膠水黏在彩虹底部(亦可用小刀在壓薄的白色造型朱古力上切出雲的形狀黏上),在陰涼處完全放乾後才可插在蛋糕上。
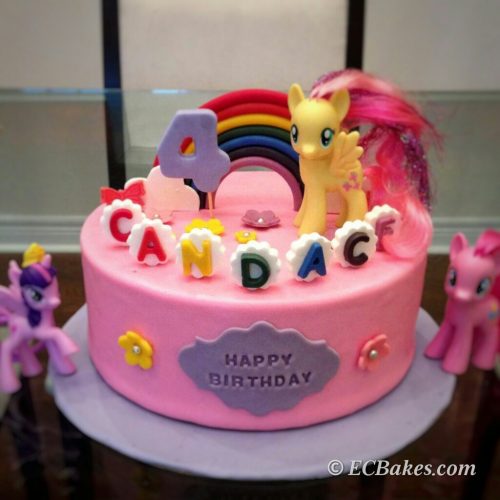
This 6-inch, two-layer vanilla birthday cake was for my daughter.
這個六吋雙層雲尼拿蛋糕是EC做給女兒的生日蛋糕。

The other one was an 8-inch, three-layer chocolate and vanilla cake made with soy milk. It was for my friend’s daughter who was allergic to milk. This was a bigger rainbow so I used a bigger circle cookie cutter as the guide when I assembling my ropes.
另一個是八吋三層雲尼拿及朱古力蛋糕,EC朋友的女兒對牛奶敏感,所以蛋糕用豆奶製成,這個彩虹比之前的較大,EC用較大的圓形曲奇印模作底。
If you want to republish this recipe, please link back to this post.
版權所有,如需引用,請註明出處
EC Bakes 小意思 Facebook 專頁 www.facebook.com/ECBakes
© Copyright 2015 ecbakes.com

Leave a comment