A friend of mine has made some really cute bow tie shaped buns recently and told me that the shaping process was super easy. I was convinced after watching the video she shared with me and decided to make some with my daughter right away.
之前朋友介紹EC做可愛的蝴蝶結造型麵包,並說製作超簡單的。看過她分享的影片後EC也認為製作十分容易,於是便立刻跟女兒動手試試。
You could use any kind of sweet bread dough to make this bread. The bread dough recipe I’m sharing below is made up of 20% all purpose and 80% bread four for a softer texture. Other sweet dough examples could be found in Dinner Rolls (Sponge Method), Milk Dinner Rolls (Tangzhong Method) and Whole Wheat Sausage Buns (Poolish Starter). Just make sure not to add too much water or the dough will be too sticky for shaping.
此麵包造型適用於任何甜麵糰,EC在配方中加入了兩成中筋麵粉使麵包更柔軟。此外,牛油麵包卷(中種法),湯種牛奶小餐包和全麥腸仔包(液種法)中的甜麵糰食譜也是不錯的選擇,只是打麵糰時水份不宜過多,否則麵糰會很黏手難以造型。
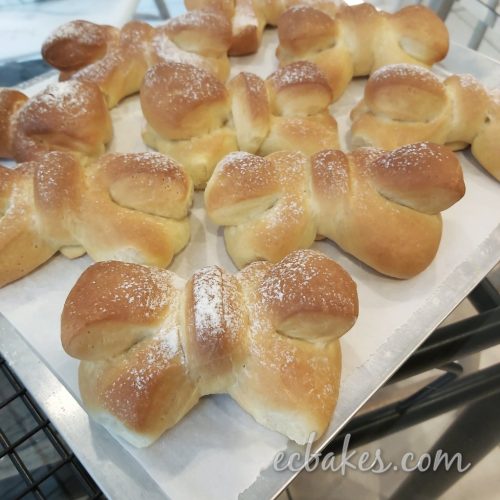
Bow Tie Buns 蝴蝶結麵包
Makes 9
9個份量
Ingredients
240 g bread flour, plus extra for dusting
60 g all purpose flour
125 -135 g water
50 g beaten egg
12 g dry milk powder
30 g granulated sugar (I used organic cane sugar)
3.3 g instant yeast
4.5 g salt
40 g unsalted butter, softened
材料
高筋麵粉 240克(加少量洒面用)
中筋麵粉 60克
水 125克至135克
全蛋液 50克
奶粉 12克
細砂糖(EC用有機原蔗糖) 30克
速發酵母 3.3克
鹽 4.5克
無鹽牛油 40克(室溫放軟)
Directions 做法
Add flour, egg and water into the mixing bowl (in order to control the dough consistency, reserve 1 to 2 tablespoons of water to be added later). Attach the dough hook and mix with low speed until a shaggy dough is formed, about 3 minutes. Cover the bowl with plastic wrap and let rest for 20 minutes to fully hydrate the dough. This is called the autolyse process.
把麵粉,蛋液和水加入廚師機的攪拌盆中,裝上麵糰勾低速攪拌約三分鐘至麵糰略成形(麵粉受水情況有異,因此建議保留一至兩湯匙水後下作調整用),蓋上保鮮紙讓麵糰休息20分鐘待麵糰充分吸收水份(這過程為水合法)。
Add milk powder, sugar and yeast and knead dough with low speed until a smooth dough starts to develop, 8 to 10 minutes. Add in salt and softened butter and continue kneading until all the butter is incorporated into the dough. Increase to medium speed and knead until the membrane is translucent and would tear easily with uneven edges when stretched. Shape dough into a tight ball and transfer dough to a lightly floured work surface or silicon mat. Cover with plastic wrap or an overturned mixing bowl and let rise in room temperature for 60 to 90 minutes or until about 2.5 times in size.
加入奶粉,糖和酵母低速揉8至10分鐘至麵糰表面略帶光滑後加入軟化牛油和鹽揉至牛油完全被吸收,改用中速揉搓至麵糰光滑並可拉出容易出現破洞的薄膜,而且破洞缺口處呈鋸齒狀(擴展階段),取出麵糰滾圓,轉放在灑粉的工作台或矽膠墊上,反轉攪拌盆或用保鮮紙蓋着麵糰,室溫發酵60至90分鐘或至麵糰約2.5倍大。

Gently deflate the dough then divide into 9 equal portions. Shape each into a ball with seam side facing down. Keep covered and let rest for 15 minutes.
用手按麵糰排氣後平均分割成9份,將麵糰滾圓後收口向下,蓋上保鮮紙鬆馳15分鐘。
Take a piece of dough and flatten into a 4-inch circle. With the smoother side facing up, make 7 cuts with a bench scraper as in the picture below. On one side of the three wedges, lift up the middle triangular piece and bring the other two pieces close together. Place the middle piece back on top. Repeat with the other side. Wrap the strip over the center and round itself then tuck the seam under and pinch to form a bow tie shape. Carefully transfer the shaped dough onto a parchment lined baking sheet. Rpeat with the remaining dough.
取一麵糰按扁成4”圓片,滑面朝上並如圖用刮板切7刀, 把其中一邊三份三角形的中間那塊拿起,把餘下的兩片擺放在一起後蓋上中央的麵糰,另外一邊也如是,把餘下的長條包裹中央後收在底部捏緊, 小心把造好型的麵糰移放在已墊牛油紙的烤盆上,重覆完成餘下造型。

Cover with plastic wrap and let rise in a warm place for 45 minutes until puffy and almost doubled in size. I proofed mine using the proof function of my oven.
蓋上保鮮紙放在溫暖的地方發酵45分鐘至差不多兩倍大,EC使用焗爐的發酵功能發酵。
Preheat the oven to 325℉/160℃ 10 minutes before baking. Lightly dust the buns with bread flour and bake for 18 minutes until lightly golden. Transfer to the cooling rack to cool.
*Adjust oven temperature and baking time according to your own oven.
*Tent with aluminum foil about ⅔ of the way if the bread appears to brown too quickly.
發酵完成前10分鐘預熱焗爐至325℉/160℃,在麵糰表面輕洒上麵粉,放入焗爐焗18分鐘至表面微微金黃,取出轉移到鋼架放涼。
*請根據自家焗爐狀況調整爐溫和時間
* 若麵糰中途已上色可於最後⅓時間加蓋錫紙

If you want to republish this recipe, please link back to this post.
版權所有,如需引用,請註明出處
EC Bakes 小意思 Facebook 專頁 www.facebook.com/ECBakes
© Copyright 2020 ecbakes.com

Leave a comment