This was my first attempt at making crispy mooncakes. Recipe for the crust was adapted from the egg custard mooncake recipe created by Chef Yip, the former Dim Sum Consultant at Spring Moon of The Peninsula Hong Kong. I tweaked the recipe by using demerara sugar and all purpose flour. I’ve also incorporated sea salt and vanilla bean paste to make the crust more flavorful. Like most of my cookies, I continued to use the reverse creaming method here. Not only does this nontraditional method minimize the formation of gluten development, but the preparation time is also quicker (read more about this method in my blog post Brown Butter Almond Cookies). The pastry crust is so flaky and buttery. My friends who tried the mooncakes all raved about them.
今年EC首次試作酥皮月餅,餅皮配方參考了半島酒店嘉麟樓前點心顧問葉潤發師傅的脆皮奶黃月餅,EC改用了原蔗糖及中筋麵粉,也在麵糰加入海鹽和雲尼拿醬增添味道。攪拌方法是EC常用的reverse creaming method,這個非傳統的攪拌方法可減少麵糰出筋的機會,製作時間亦較短(詳情可參考雙色焦牛油曲奇)。餅皮充滿牛油香,質地也十分鬆化,EC的朋友試味後也大讚好吃。
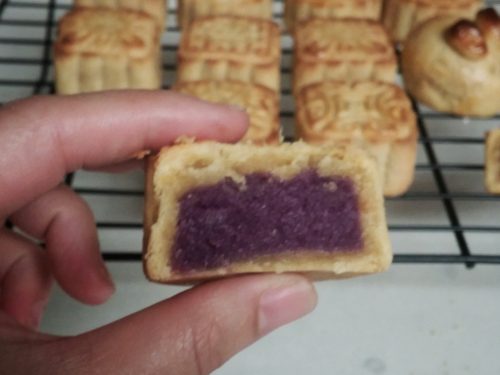
The amount of sugar in the crust has been reduced; however, the butter content is pretty heavy. As a healthier substitute of the egg custard, I chose sweet potato as the filling. Roasted sweet potatoes are naturally sweet. A small amount of sugar and coconut oil is what you need to transform it into a smooth and creamy filling.
餅皮雖然已減了糖,但牛油含量較多,因此餡料方面EC選用了蕃薯。蕃薯烤熟後有天然甜味,只是加少量糖及椰子油己能做成軟滑餡料,比起奶黃來得健康。
I didn’t start making mooncakes at home until last year. I’ve encountered problems like cracked, burst or deformed crust, as well as ruined pattern on the surface. From my previous trials, I believe the temperature control for both the oven and the mooncakes themselves is crucial for successful mooncakes. The crust will form into shape faster at a higher oven temperature, preventing the crust from deforming. Chilling the mooncakes thoroughly prior to baking, on the other hand, will prevent the crust from bursting, cracking, or melting too fast. The pre-cooked filling won’t get too hot and expand within the crust, the major cause for cracks in the mooncakes. I prefer all purpose flour for my cookies because of the nice crunch it gives. Because of a higher gluten content, all purpose flour actually retains the mooncake pattern better compared to cake and pastry flour. Egg wash should be brushed on lightly only after the mooncakes have cooled down slightly. Otherwise, the pattern on the surface will be smeared easily. Hope my above tips help with a successful mooncake journey!
EC去年才開始自己在家做月餅,曾遇過的問題包括餅皮爆裂、象腳和花紋模糊。總結之前累積的經驗,EC覺得焗爐及月餅本身的溫度控制均十分重要。較高的爐溫有助餅皮快速成形避免月餅變形。相反,把月餅充份冷藏後才送進焗爐則可預防象腳及餅皮溶化,餡料也不會受熱過度膨脹令月餅爆開。EC慣用中筋麵粉做曲奇,因為口感較紮實和鬆脆,而中筋麵粉因為筋度足夠,比低筋麵粉更能維持漂亮的花紋。掃蛋液時也要待月餅稍放涼後才輕力掃上,否則容易弄花圖案。希望以上心得對大家有幫助吧!

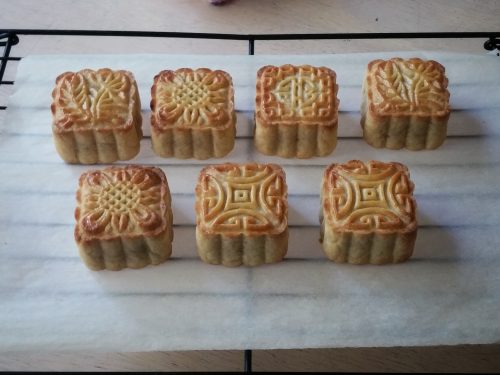
Crispy Coconut Sweet Potato Mooncakes
脆皮椰香蕃薯月餅
Makes 15 mini mooncakes
可做15個迷你月餅
Ingredients
For the Pastry Crust
225 g all-purpose flour, plus extra for dusting
9 g custard powder
9 g organic coconut flour
45 g fine demerara sugar
1/8 tsp sea salt
115 g cold unsalted butter, cubed
26 g egg
23 g evaporated milk
1/2 tsp vanilla bean paste
For the Filling
160 g coconut purple sweet potato paste (refer to Snow Skin Mooncakes for recipe)
140 g coconut sweet potato paste (see recipe here)
For the Egg Wash & Glaze
1/2 large egg, beaten and strained
Honey or Golden Syrup as needed
材料
月餅曲奇皮
中筋麵粉 225克(另加少量掃面用)
吉士粉 9克
有機椰子粉 9克
幼粒原蔗糖 45克
海鹽 1/8茶匙
無鹽牛油 115克(凍及切丁)
蛋液 26克
淡忌廉或淡奶 23克
雲尼拿醬 1/2茶匙
餡料
椰香紫薯餡 160克(食譜請參考冰皮月餅)
椰香蕃薯餡 140克(食譜請到這裡)
掃面用蛋液及糖漿
大蛋 半隻(打散後過篩)
金黃糖漿或蜜糖 適量
Directions 做法
For the Pastry Crust 月餅曲奇皮
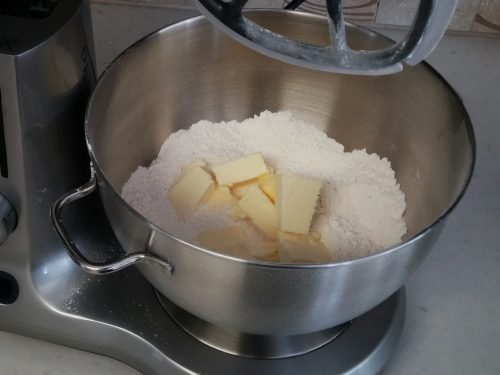
Sift flour, custard powder, coconut flour, sugar and salt into a mixing bowl. Whisk to combine.
麵粉、吉士粉、椰子粉、糖及鹽混合過篩放鋼盆中,用蛋拂拌勻。
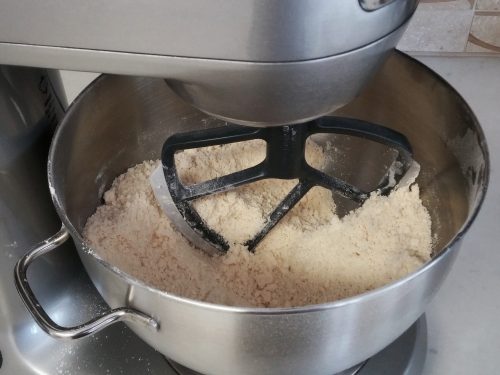
Add in cold butter cubes. With a hand mixer or stand mixer fitted with the paddle attachment, mix on low speed until the mixture resembles bread crumbs or wet sand. Use a large mixing bowl and cut the butter into even smaller pieces if hand mixer is used in order to prevent the ingredients from flying around.
加入凍牛油粒,用電動打蛋器或座枱式攪拌器(使用攪拌槳配件)以慢速攪拌至混合物呈濕沙或麵包糠狀,用電動打蛋器時可把牛油粒切碎一些,亦要把材料放在很大的容器中,否則材料很易從碗中飛出。
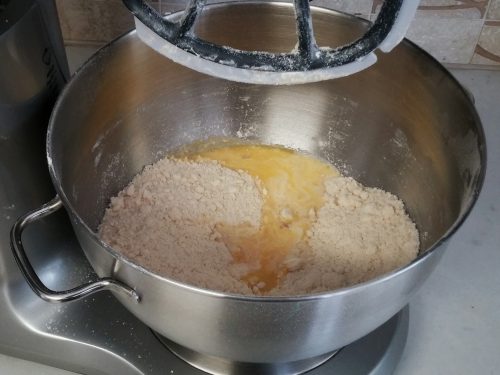
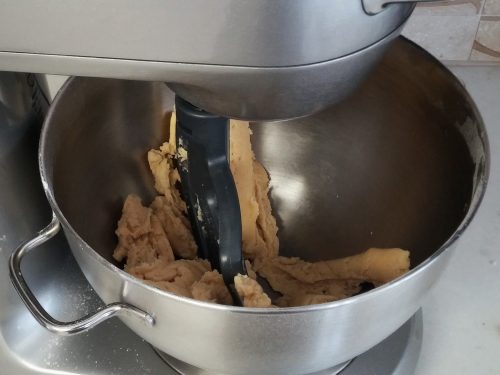
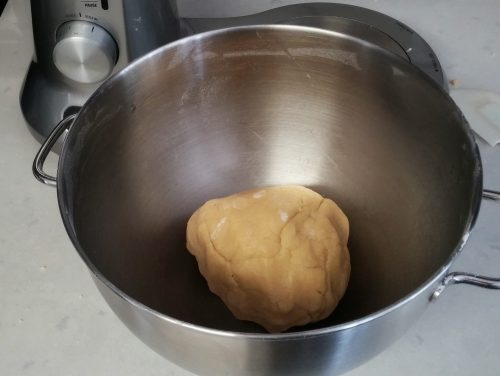
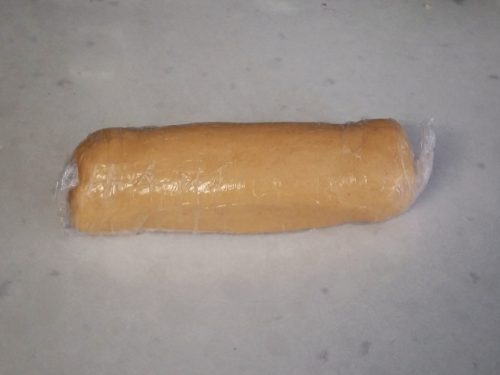
Add egg, whipping cream and vanilla paste then mix with low speed until several large clumps form. Gather clumps and lightly press them together to form a dough. Shape dough into a log then wrap with plastic wrap. Let rest in the fridge for an hour.
加入蛋液、淡忌廉及雲尼拿醬,以慢速拌至材料結成大塊,用手輕輕整合成麵糰,取出搓成長條後用保鮮紙包好,放進雪櫃休息一小時。
For Shaping 造型
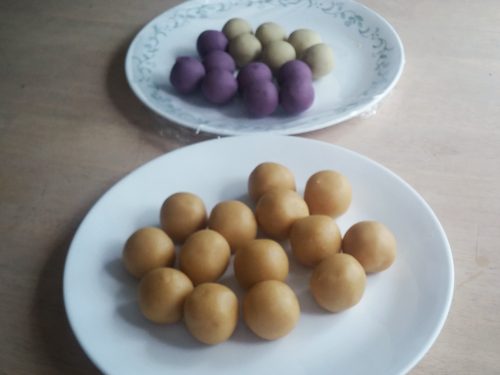
Divide the purple sweet potato paste into 8 portions and sweet potato paste into 7 portions (all 20 g each). Shape each into a ball and chill thoroughly before use. Divide the pastry crust dough into 15 equal portions (30 g each). Shape each into a ball. Set aside.
紫薯餡分成8份,蕃薯餡分7份,每份20克,搓圓後保持冷藏,把曲奇皮麵糰分成15份,每份30克,搓圓備用。
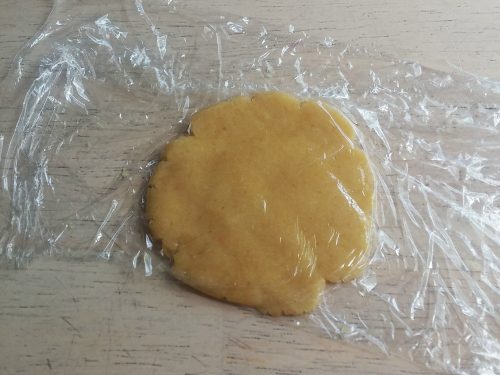
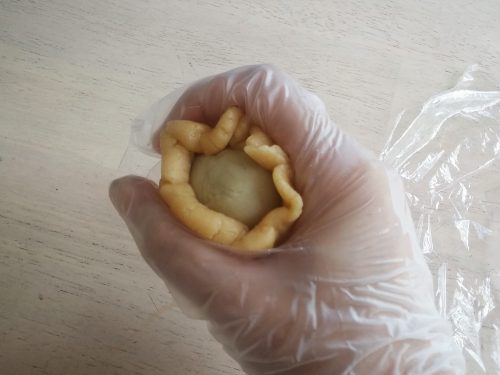
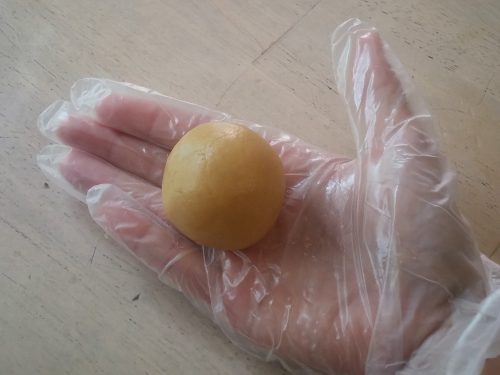
Take a portion of dough and flatten into a disc between two pieces of plastic wrap. The dough should be slightly thinner around the edges. Remove plastic wraps and place a ball of filling in the middle. Wrap then seal edges by pinching them together. I held the dough with one hand and used my purlicue (the space between my thumb and my forefinger) of the other hand to seal the edges while turning the dough slightly. Shape the stuffed dough into a ball again. Repeat with remaining portions.
取一份麵糰放在兩張保鮮紙中間用手按扁,中央要比邊緣厚,取走保鮮紙後包入餡料並收口(EC用虎口位把餅皮慢慢往上推並收口),搓至光滑,重覆包入餡料直至完成。

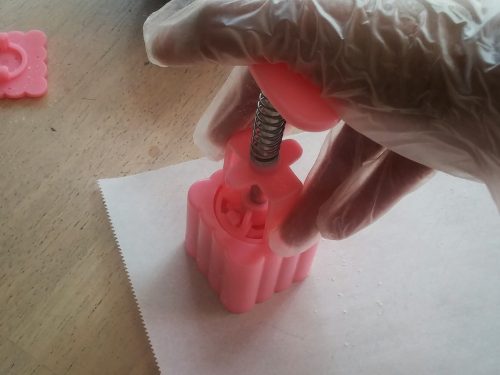
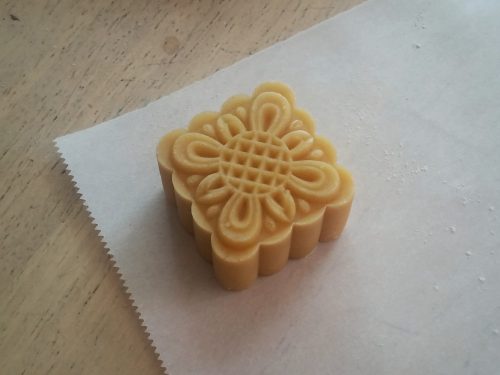
Brush a thin layer of flour on the inside of a 50-g mooncake mold to prevent sticking then tap off excess flour. Coat a stuffed mooncake slightly with flour then insert into the mold, seam side out. Flatten the dough slightly to fill up the mold. Place mold upright onto a parchment paper lined baking tray then press down firmly onto the plunger for 5 seconds to make an imprint. Press the plunger down again to release the mooncake. Repeat with the rest of the dough. Chill shaped mooncakes for at least 30 minutes.
50克月餅模內掃上麵粉後拍走,月餅洒上一層薄麵粉後放入模中(收口向外),輕輕把月餅依模形按平,把模反轉放在已墊牛油紙的烤盆上,按下把手緊壓五秒印上花紋,之後按動把手推出月餅,完成所有月餅造型後放入雪櫃冷藏至少30分鐘定型。

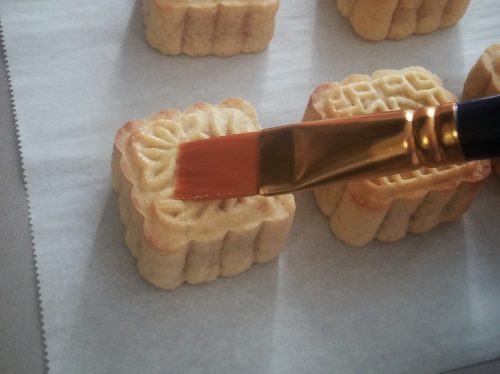
Preheat oven to 400℉/200℃ for 15 minutes before baking. Remove mooncakes from the fridge and bake for 8 minutes. Cool on a cooling rack for 5 minutes. Brush surface with a thin layer of egg wash then let dry for 10 minutes. Brush on another coat of egg wash. Bake for 6 more minutes until lightly golden brown. For a darker color pattern, cool for 10 minutes then brush on the syrup. Broil for 2 more minutes to caramelize the top. Do not leave the oven unattended and pay close attention to the color change. Remove from oven and let cool for 10 minutes. If the color of the bottom of the mooncakes is too pale or soft then flip the mooncakes upside down and bake for 2 to 3 minutes more at 375ºF/190ºC. Transfer to a cooling rack to cool completely.
焗爐預先預熱15分鐘至400ºF/200ºC,月餅從雪櫃取出,放入焗爐焗8分鐘定型後取出,放涼5分鐘,在表面花紋處掃上薄蛋漿,10分鐘後掃上第二次蛋漿,放回焗爐6分鐘至金黃色後取出,若要花紋更深色可放涼10分鐘後在表面花紋處掃上糖漿,用上火焗2分鐘烤成焦糖後立刻取出(要留心觀察上色情況不要離開焗爐),取出放涼10分鐘,如月餅底部仍然淺色或偏軟可反轉月餅以375ºF/190ºC多焗2至3分鐘至微微金黃,轉移鋼架完全放凉。

The mooncakes are best eaten within two days. For longer storage, keep them in the fridge no longer than a week and warm in a 350ºF/175ºC preheated oven for 5 to 8 minutes.
月餅適宜兩天內享用,放雪櫃可保存不超過一星期,食用前可放在350ºF/175ºC預熱焗爐翻熱5至8分鐘。
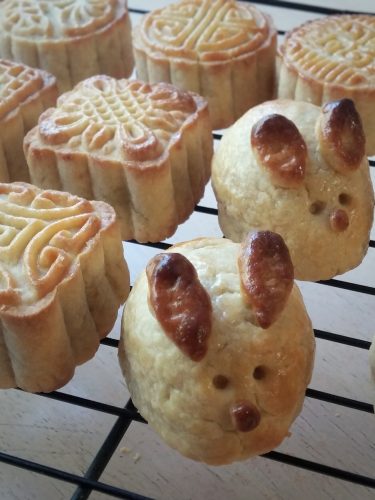
The inside of the mooncakes. I also shaped a few into a rabbit.
切開後的月餅,EC把一些月餅做成小兔子。

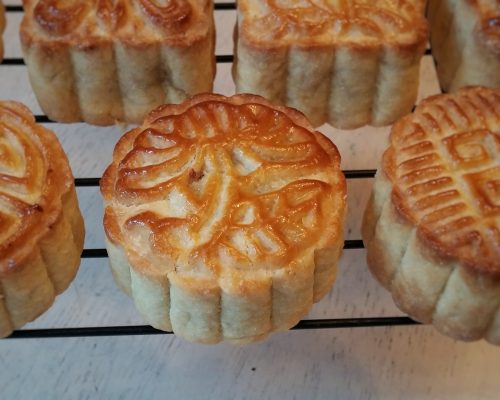
Brushing the surface with honey or syrup then caramelizing the top makes the pattern more prominent.
掃上蜜糖或糖漿後再烤至焦糖色更能突顯花紋。
If you want to republish this recipe, please link back to this post.
版權所有,如需引用,請註明出處
EC Bakes 小意思 Facebook 專頁 www.facebook.com/ECBakes
© Copyright 2016 ecbakes.com

Leave a comment